Concrete Slump Test: IS 1199 Procedure, Slump Cone Dimensions & Interpretation
A ready-mix truck rolls onto your site. Before a single wheelbarrow moves, one quick check — barely 30 seconds with a metal cone — decides whether that ₹8,000 load gets poured or turned away at the gate. That check is the slump test. Skip it, rush it, or read it wrong, and good concrete quietly […]
A ready-mix truck rolls onto your site. Before a single wheelbarrow moves, one quick check — barely 30 seconds with a metal cone — decides whether that ₹8,000 load gets poured or turned away at the gate.
That check is the slump test. Skip it, rush it, or read it wrong, and good concrete quietly turns into a weak slab you won’t notice until it cracks. Get it right, and you’ve caught a bad batch before it ever touched your formwork.
Here’s everything that matters — the exact cone, the method, and how to actually read the number — the way it’s done on real Indian sites, per IS 1199 and IS 456.
What the slump number is really telling you
Slump measures workability — how easily fresh concrete flows, fills the formwork and wraps around steel without you fighting it. Think of it as the concrete’s honesty test.
Too stiff, and it won’t compact — you get honeycombing and voids around the rebar. Too wet, and someone’s added water on the sly; strength and durability drop with every extra litre. The slump cone catches both, on the spot, with no power and no lab. That’s why it’s the one test that happens at every gate, every pour, every RMC plant in the country.
The cone itself: exact IS 1199 dimensions
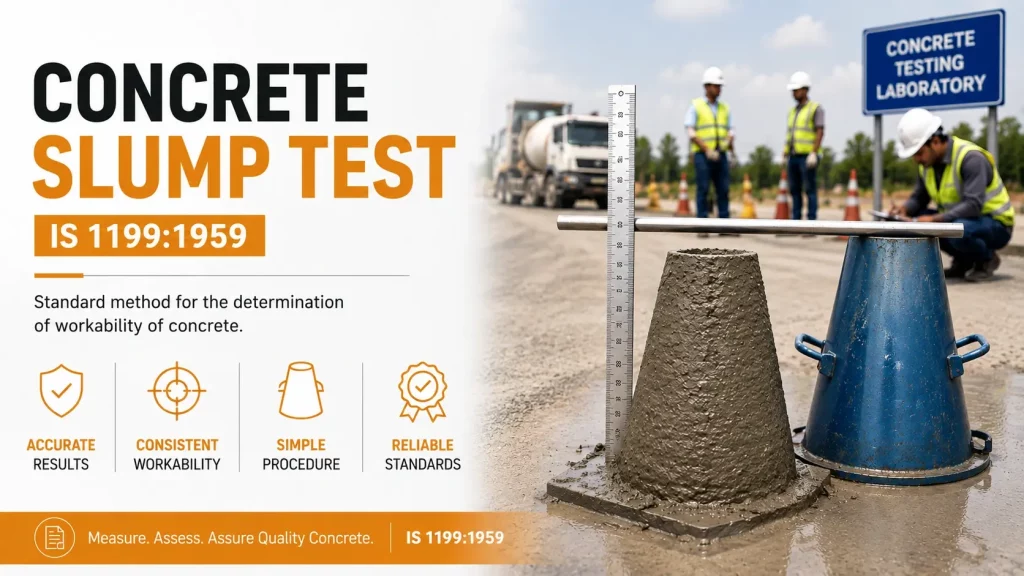
The tool is deceptively simple — an open metal cone, sometimes called the Abrams cone. But the geometry isn’t up for debate. IS 1199 pins it down:
| Part | Dimension (IS 1199) |
|---|---|
| Bottom internal diameter | 200 mm |
| Top internal diameter | 100 mm |
| Height | 300 mm |
| Metal thickness | ≥ 1.6 mm |
| Tamping rod | 16 mm dia × 600 mm, one end rounded |
Those numbers matter more than they look. A dented or worn cone quietly changes your readings — and suddenly two site engineers are arguing over concrete that was fine all along.
How the test actually goes
Start to finish, it’s under three minutes. Here’s the rhythm:
- Dampen the cone and base plate, set the cone on a level surface, and stand on the foot rests to hold it down.
- Fill it in three layers. Rod each layer 25 times, spread evenly — not 25 jabs in the same spot.
- Strike the top level with the cone.
- Now the moment that decides everything: lift the cone straight up, slow and steady, in 5–10 seconds. No twist, no lean.
- Set the cone beside the slumped concrete, lay the rod across the top, and measure the drop. That gap, in millimetres, is your slump.
True, shear, collapse — reading the shape
The concrete tells you how it slumped, and each shape means something:
- True slump — it settles evenly, like a soft dome. This is the only reading you can trust.
- Shear slump — the top half slides off to one side. Bin it and retest; the mix or the lift was off.
- Collapse slump — it flattens out completely. The mix is too wet or too lean, and honestly, the slump test has left the chat — you need a different measure of workability.
So what’s a “good” slump?
There’s no single right answer — it depends on what you’re pouring and how you’re placing it.
| Slump | Workability | Where you’d want it |
|---|---|---|
| 0–25 mm | Very low | Road pavements, mass concrete, heavy vibration |
| 25–50 mm | Low | Foundations, lightly reinforced sections |
| 50–100 mm | Medium | Everyday RCC — slabs, beams, columns |
| 100–175 mm | High | Heavily reinforced, pumped and self-levelling mixes |
Where sites get it wrong
Most bad slump readings aren’t the concrete’s fault — they’re the operator’s:
- The tilt. Lift the cone at an angle and you’ll fake a shear slump every time. Straight up, always.
- The delay. Test within two to three minutes of sampling. Let it sit and the mix stiffens — your number lies.
- The shortcut. Skimp on the 25 strokes or use a flat-ended rod, and you’re not running an IS 1199 test anymore.
- The tired cone. A cone that’s been kicked around a site for three years needs a calibration check. Worn geometry, wrong answers.
Getting a slump cone that lasts
A slump set is cheap — until a soft, out-of-spec one costs you a rejected pour or a failed audit. JS Civil Lab Solutions supplies IS 1199-compliant slump cone sets — cone, tamping rod and base plate — built for RMC plants, contractors, colleges and NABL labs, with a traceable calibration certificate and pan-India delivery.
Want one that’ll still read true in year five? Call or WhatsApp +91 93596 24761, or take a look here:
→ Slump Cone for Concrete Workability Testing (IS 1199)
Related: Concrete Cube Moulds · Air Entrainment Meter
Frequently asked questions
What is the standard slump cone size? Per IS 1199 it’s 200 mm wide at the base, 100 mm at the top and 300 mm tall, paired with a 16 mm × 600 mm tamping rod.
What’s a good slump value for concrete? For most reinforced work, 25–100 mm. Pumped or congested-rebar pours often need 100–175 mm; pavement concrete sits much lower, around 0–25 mm.
True slump vs collapse slump — what’s the difference? A true slump settles evenly and is the only valid reading. A collapse slump means the mix is too wet or lean, and the slump test no longer applies — reach for a different workability check.